Things you need to worry about in winter if you have a cat

iStock-682940458.jpg
  • Cats are attracted to the sweet smell and taste of antifreeze, but if eaten, this toxin can quickly cause kidney failure.
  • Outdoor cats depend on people for their warmth and survival during the winter months; special steps need to be taken to keep these cats safe.
  • Holidays are a time for celebration but can pose multiple risks to cats. Lilies, chocolate, alcohol, ribbons, tinsel, and other common holiday items can all be dangerous to our feline companions.

What You Need to Know

Cats that spend time outdoors are exposed to various environmental and physical dangers. In the winter, cats are at risk for frostbite and hypothermia (low body temperature), just like humans. Cats should not be left outside for long periods of time in the winter and should always have the option of coming inside. It’s important to be aware of these risks, so you can keep your cat safe and healthy.

Colder Temperatures

Once temperatures start to dip below the freezing point, remember that any outdoor water will freeze. Cats need a constant supply of fresh, unfrozen water. For outdoor cats that only have access to outdoor water, heated water bowls can be used to keep water from freezing. If an electrical source is not available, water should be kept in a covered, enclosed space to prevent it from freezing quickly. Dog igloos filled with straw work well for outdoor cats, giving them a warm place to eat, drink, and keep dry from the winter elements. Heated pet mats are also helpful and will help a cat retain its body temperature, which is especially important for old or sick cats. It is important to only use heated products that are approved for pets.

Cats that spend a lot of time outdoors during the winter months use more calories in order to stay warm. Giving your cat a higher-quality, protein-rich food will help him or her stay warm and healthy. If your cat has any medical problems, consult your veterinarian before making any diet changes.

Outdoor cats may seek warmth under car hoods and can be injured or killed by the car’s fan belt. Before getting into your car, knock loudly on the hood to ensure that a cat is not hiding beneath.

Even cats that are used to being outside can suffer hypothermia and frostbite. If severe winter storm warnings or extreme cold weather alerts recommending that humans stay indoors are issued in your area, it is a good idea to bring your cat indoors, too. If your cat cannot be brought indoors, a garage or mud room can provide enough shelter in some cases.

Antifreeze

Also known as ethylene glycol, antifreeze is probably one of the most common and dangerous winter toxins. Antifreeze is highly toxic, and cats are sometimes attracted to its sweet smell and taste. Once a cat drinks antifreeze, the toxin is rapidly absorbed, and signs such as vomiting, loss of coordination, and depression can appear within 1 hour. The kidneys are most severely affected by antifreeze, and even if signs start to improve with treatment, they may have already started to shut down. Acute kidney failure can occur within 12 to 24 hours after ingestion of antifreeze, so it is important to take your cat to the vet immediately if you suspect he or she has drunk even a small amount of antifreeze.

Salt and Chemical Ice Melts

Cats that walk on sidewalks or pathways that have been de-iced can have chapped, dry, painful paws. Also, because cats tend to lick their paws, they can be exposed to toxic chemicals found in some ice melts. Pet-safe ice melt products can be purchased at most home improvement and pet stores. However, not everyone in the neighborhood may use these products, so it is important to wash your cat’s feet with a warm cloth after he or she comes in from being outside.

Holiday Hazards

The holidays pose many risks to cats. Chocolate, alcohol, onions, and coffee are some of the popular party supplies that can cause health problems in your cat. A common holiday plant is the lily, found in many holiday arrangements. Lilies are poisonous to cats. If a cat eats any part of a lily, initial signs of poisoning could include lethargy (tiredness) and a lack of appetite, but kidney failure can occur within 36 to 72 hours. Contact your veterinarian immediately if you think your cat has eaten any part of a lily plant.

Most cats love tinsel and ribbon, which, if eaten, can damage the intestines, requiring surgery. Keep these items out of reach of your cat.

Cover up electrical cords to prevent them from dangling and being mistaken for cat toys. If chewed, these cords could electrocute your cat.

More Cold-Weather Tips

The ASPCA (American Society for the Prevention of Cruelty to Animals) has more cold-weather tips at its website: www.aspca.org. Additional information about toxic houseplants, antifreeze, and other winter toxins is available at the Animal Poison Control Center: http://www.aspca.org/pet-care/poison-control/.

Do I really need to brush my cat's teeth?

  • 85% of all pets have periodontal disease by the time they are 3 years of age.
  • Dental disease can result in bad breath, painful chewing, and tooth loss.
  • Bacteria under the gum can travel to the heart, kidneys, and liver.
  • A professional dental cleaning is required to remove plaque and tartar from a pet’s teeth and to assess the health of the mouth.
  • A thorough dental cleaning requires that the pet be under anesthesia.
  • Regular, at-home dental care can help improve the health of your pet’s mouth and lengthen the intervals between professional dental cleanings.
iStock-173910545.jpg

It’s estimated that 85% of all pets have periodontal disease by the time they are 3 years of age. Periodontal disease is a progressive disease of the supporting tissues surrounding teeth and the main cause of early tooth loss.

Periodontal disease starts when bacteria combine with food particles to form plaque on the teeth. Within days, minerals in the saliva bond with the plaque to form tartar, a hard substance that adheres to the teeth. The bacteria work their way under the gums and cause gingivitis—inflammation of the gums. Once under the gums, bacteria destroy the supporting tissue around the tooth, leading to tooth loss. This condition is known as periodontitis. Gingivitis and periodontitis make up the changes that are referred to as periodontal disease. The bacteria associated with periodontal disease can also travel in the bloodstream to infect the heart, kidneys, and liver.

A professional veterinary dental cleaning is the only way to remove tartar from the teeth and under the gum tissue to protect your pet’s health. With a professional dental cleaning and follow-up care, gingivitis is reversible. Periodontal disease is not reversible, but diligent at-home dental care and regular veterinary cleanings can slow down the progression of the condition.

What Is a Dental Cleaning?

During a dental cleaning (sometimes called a prophylaxis), (1) plaque and tartar are removed from a pet’s teeth and (2) the health of the entire mouth (tongue, gums, lips, and teeth) is assessed. A thorough dental cleaning can be accomplished only while the pet is under general anesthesia. Anesthesia keeps your pet free of pain during the dental procedure and allows your veterinarian to fully inspect the teeth and remove tartar from under the gums. During anesthesia, a soft plastic tube is inserted into the trachea (the main airway in the throat) to support the patient’s breathing. Placement of the tracheal tube also prevents inhalation of bacteria that are aerosolized during the dental cleaning.

A dental cleaning may include the following:

  • Removal of visible plaque and tartar from the teeth
  • Elimination of plaque and tartar from under the gum
  • Probing of dental sockets to assess dental disease
  • Polishing to smooth enamel scratches that may attract bacteria
  • Dental radiographs (x-rays) to evaluate problems below the gum line
  • Application of fluoride or a dental sealer
  • Removal or repair of fractured or infected teeth
  • Dental charting so progression of dental disease can be monitored over time
  • Inspection of the lips, tongue, and entire mouth for growths, wounds, or other problems

How Do I Know if My Pet Needs a Dental Cleaning?

Regular inspection of your pet’s mouth is important to catch dental disease in the early stages. Tartar may appear as a brownish-gold buildup on the teeth, close to the gum line. Redness or bleeding along the gum line may indicate gingivitis. Other signs of dental disease include:

  • Bad breath
  • Drooling
  • Pawing at the mouth
  • Difficulty chewing
  • Loose or missing teeth

If you notice any of these signs in your pet, schedule an appointment with your veterinarian.

What Are the Benefits of a Dental Cleaning?

A professional dental cleaning removes not only the visible plaque and tartar on the teeth surfaces but also the bacteria under the gums. This eliminates potential sources of infection to the mouth and other organs and protects your pet from pain and tooth loss.

What Can I Do to Keep My Pet’s Teeth Clean?

Once a dental cleaning has been performed, you can take a number of steps at home to keep your pet’s teeth clean and lengthen the intervals between dental cleanings.

Your veterinarian may recommend a plaque prevention product—a substance that you apply to your pet’s teeth and gums on a weekly basis. The product adheres to the teeth surface to create a barrier that prevents plaque from forming.

Just as in people, daily brushing can help remove food particles from between your pet’s teeth. You can use a child’s toothbrush or purchase a finger brush from your veterinarian. Human toothpastes should be avoided because they contain ingredients that should not be swallowed by your pet. Your dog or cat may like the taste of pet toothpaste, which is available in flavors such as chicken, seafood, and malt.

Several dental diets and treats can also help keep plaque and tartar to a minimum. The diets tend to have larger kibbles to provide abrasive action against the tooth surface when chewed. Or they may contain ingredients that help prevent tartar mineralization. Ask your veterinarian which diets or treats are appropriate for your pet.

Why do I have to vaccinate my cat?

  • Vaccination is an important weapon against infectious diseases.
  • Some diseases, like rabies, are transmissible to humans, so protecting your pets also protects your family members and community.
  • Pets that stay indoors also can be exposed to infectious diseases, so even indoor cats can benefit from vaccinations.
  • Vaccines are safe and generally well tolerated by most pets.
  • Vaccine selection and scheduling should be an individualized choice that you and your veterinarian make together.
iStock-542177510.jpg

Companion animals today have the opportunity to live longer, healthier lives than ever before, in part due to the availability of vaccines that can protect pets from deadly infectious diseases. Over the past several decades, the widespread use of vaccines against diseases like rabies has saved the lives of millions of pets and driven some diseases into relative obscurity. Unfortunately, infectious diseases still pose a significant threat to dogs and cats that are unvaccinated; therefore, although vaccine programs have been highly successful, pet owners and veterinarians cannot afford to be complacent about the importance of keeping pets up-to-date on their vaccinations.

How Do Vaccines Work?

Although there are many types of vaccines, they tend to work through a similar principle. Most vaccines contain a very small portion of the virus or bacterium that is the infectious agent. Some vaccines contain small quantities of the entire virus or bacterium, whereas others contain particles that are part of the infectious organism. When this material is introduced into the body in a vaccine, the body’s immune system responds through a series of steps that include making antibodies and modifying other cells that will recognize the target organism later. When the vaccinated individual encounters the “real” organism later, the body recognizes the organism and reacts to protect the vaccinated individual from becoming sick.

Why Does My Pet Need Vaccines?

Vaccines protect your pet

Vaccines are one of our most important weapons against infectious diseases. Some diseases, such as “kennel cough,” in dogs and rhinotracheitis in cats can be transmitted directly from pet to pet. If your pet is ever around other animals, such as at a kennel, dog park, grooming salon, or daycare facility, exposure to infectious disease is possible. Even pets that look healthy on the outside may be sick, so keeping your pet’s vaccines up-to-date is a good way to help prevent illness.

Even primarily indoor pets can be exposed to diseases

Even if your pet doesn’t have direct contact with other animals, some diseases can be transmitted indirectly. For example, parvovirus infection, which is potentially fatal, is spread through contact with feces from an infected dog. Even if your dog never has contact with a dog infected with parvovirus, exposure to the virus can occur through contact with feces from an infected dog, such as in a park or on a beach. Lyme disease—a dangerous infection that is carried by ticks—is another disease that your dog can be exposed to without coming into contact with other dogs.

In cats, panleukopenia infection is potentially fatal and spread through contact with body fluids (mostly urine and feces) from an infected cat. Once a cat is infected with panleukopenia, it may shed virus in body fluids for a few days or up to six weeks. Panleukopenia can live in the environment (such as on contaminated bedding, food bowls, litter boxes, and other items) for a very long time, so contact with contaminated objects can spread the infection to other cats. Additionally, if a pet owner is handling an infected cat, failure to change clothes and wash hands thoroughly with the correct disinfectant can expose other cats to the disease.

So, even pets that spend most of their lives indoors or have very limited contact with other animals are not completely safe from exposure to infectious diseases.

Vaccines protect your family and community

Some infectious diseases, such as leptospirosis in dogs and rabies in dogs and cats, are zoonotic diseases. That means humans also can become infected.  In the case of rabies and leptospirosis, both diseases can cause serious illness and death in infected individuals – including humans. Protecting your pets against these diseases also protects the rest of your family members, as well as other pets and people in your community.

Are Vaccines Safe?

All of the available vaccines for dogs and cats have been thoroughly tested and found to be safe when administered as directed. Most pets tolerate vaccines very well, although reactions can occur in some cases. Some pets can seem a little “tired” after receiving vaccines. But notify your veterinarian if your pet develops breathing problems, facial swelling, vomiting, hives, redness on the skin, or other unusual changes after receiving a vaccine. You also should tell your veterinarian if your pet has ever had a problem in the past after receiving a vaccine.

Which Vaccines Does My Pet Need?

Many vaccines are available for dogs and cats, but every pet does not need to receive every available vaccine. So how do you know which vaccines your pet should have? The American Animal Hospital Association (AAHA) and the American Association of Feline Practitioners (AAFP) have summarized vaccine recommendations to help veterinarians clarify how to best protect dogs and cats through the use of vaccine programs. AAHA and AAFP evaluated the available vaccines and categorized them to provide guidelines on how commonly they should be used. Vaccines are categorized as core, non-core, or not recommended. A core vaccine is one that all pets should receive. The core vaccines for dogs are rabies, distemper, adenovirus-2, and parvovirus; and the core vaccines for cats are rabies, rhinotracheitis (feline herpesvirus-1), panleukopenia (feline distemper), and calicivirus. Non-core vaccines are optional ones that pets can benefit from based on their risk for exposure to the disease. Examples include the vaccines against Lyme disease and leptospirosis in dogs, and the vaccines against feline leukemia virus and feline immunodeficiency virus (or feline AIDS) in cats. Categorization of a vaccine as “not recommended” does not mean that the vaccine is bad or dangerous. This designation simply means that widespread use of the vaccine is not currently recommended.

Because core vaccines are recommended for all pets, your veterinarian will recommend keeping these vaccines up-to-date at all times. The decision regarding non-core vaccines should be made after you and your veterinarian have discussed the vaccines in question and whether your pet might benefit from receiving them. Factors to consider include your pet’s lifestyle (how much time your pet spends outside), where you live, where you travel with your pet, and how often your pet has contact with other animals. Bear in mind that vaccine recommendations and your pet’s lifestyle can change. Your veterinarian may want to discuss modifying the vaccine recommendations to ensure that your pet is well protected.

What Is The Recommended Schedule For Vaccines? 

Puppies and kittens generally receive their first vaccines when they are around six to eight weeks of age (depending on the vaccine and manufacturer’s recommendations). Booster vaccines are generally given during your puppy or kitten checkup visits; your veterinarian can discuss the recommended schedule with you. Vaccines are generally repeated a year later.

Although puppies and kittens are considered especially vulnerable to some diseases, it is also very important for adult pets to be up-to-date on vaccines. Traditionally, many vaccines were repeated yearly, during regular checkup examinations. However, research has shown that some vaccines can protect pets for longer than one year. In light of these findings, the AAHA and AAFP guidelines note that some vaccines don't need to be repeated more frequently than every three years. The decision regarding how often your pet needs vaccine boosters depends on several factors, including your pet’s overall health status and risk for exposure to the diseases in question. Your veterinarian may recommend annual boosters after considering your pet’s lifestyle and disease exposure risk. The decision regarding how often to administer any vaccine (annually, every three years, or not at all) should be an individualized choice that you and your veterinarian make together.

Vaccination remains one of the most important services your veterinarian offers, and although vaccination is a routine procedure, it should not be taken for granted. It also allows a regular opportunity for your veterinarian to perform a physical examination, which is very important for keeping your pet healthy. Protecting patients is your veterinarian’s primary goal, and developing an appropriate vaccine protocol for your pet is as important as any other area of medicine.

How do I know if my cat is sick?

iStock-843827698.jpg
  • Any change in your cat’s normal behavior, such as increased lethargy (tiredness), changes in appetite, weight loss, or hiding in the house may be indications that your cat is ill.
  • Male cats that frequent the litter box but are unable to urinate should be seen by a veterinarian immediately.
  • If your cat has eaten string, and a portion of the string is still visible, leave the string in place, and see your veterinarian as soon as possible.
  • If your cat becomes ill outside of normal clinic business hours, call an emergency veterinary clinic for guidance.
  • Some illnesses require immediate veterinary attention, so when in doubt, call a veterinary professional.

How Can I Tell if My Cat Is Sick?

Any decreases in energy level, appetite, or weight may signal that your cat is not feeling well. If your male cat is squatting to urinate, but no urine appears, call your veterinarian immediately. It is common for the urinary tract in male cats to become blocked. This condition is not only extremely painful; it’s a medical emergency.

It is also common for cats to ingest string, yarn, or dental floss, which can cause problems in the intestinal tract. If you notice a string hanging from your cat’s mouth or anus, do not pull the string out. Leave the string in place and bring your cat to the nearest veterinary clinic.

Other signs that your cat may be ill include:

  • Bloody urine or accidents outside the litter box
  • Increased drinking and/or urination
  • Vomiting
  • Diarrhea or bloody stools
  • Constipation
  • Sneezing or nasal discharge
  • Runny eyes or holding one eyelid shut
  • Difficulty breathing
  • Limping or inability to use hind legs
  • Unusual lumps, bumps, or swellings
  • Bad breath or excessive drooling
  • Hiding or yowling

If you are concerned that your cat may have a fever, you can measure its temperature with a thermometer in the rectum. Normal temperature for a cat is 100.5 to 102.5 degrees Fahrenheit. If your cat’s temperature is above or below this range, contact your veterinarian.

What Should I Do if I Suspect That My Cat Is Sick?

If your cat shows signs of illness, don’t wait—call your veterinarian at once. If it is outside of normal clinic business hours, contact an emergency veterinary clinic. Some illnesses may require immediate veterinary attention, so it’s in your cat’s best interest for you to ask if it needs to be seen right away.

If your cat goes outdoors, you may not always know when he or she has been exposed to toxins or suffered trauma from cars, dogs, or cat fights. Internal injuries may not be immediately apparent, but should be attended to as soon as possible. If you suspect that your cat may have been injured, call your veterinarian.

My cat has arthritis—what do I do?

iStock-879798798.jpg

Arthritis is a joint problem that can reduce a cat’s mobility and cause severe, chronic pain. You can improve life for your arthritic cat by doing the following:

  • Help your cat get or stay slim so that unnecessary weight doesn’t increase the load on your cat’s joints, resulting in more pain and inflammation. Ask your veterinarian to recommend an exercise program and a diet that are appropriate for your cat.
  • Because arthritis is aggravated by the cold and damp, keep your cat warm and dry. Padded cat beds can help.  
  • Apply warm compresses to soothe your cat’s affected joints. Make sure the compress is not too hot, which can burn the skin.
  • Learn how massage can increase your cat’s flexibility, circulation, and sense of well-being. Professional animal massage therapists are available.
  • Ask your veterinarian about medication to help manage your cat’s arthritis. Never give your cat a drug without your veterinarian’s recommendation. Many human and canine pain relievers are poisonous to cats. Your veterinarian may prescribe the following:
    • Nonsteroidal antiinflammatory drugs (NSAIDs), which can reduce the pain and inflammation associated with arthritis.
    • Corticosteroids, which can suppress arthritis-associated inflammation for short periods of time.
    • Disease-modifying osteoarthritis drugs (DMOADs), which can be an important part of managing arthritis.
  • Ask your veterinarian about glucosamine, chondroitin, and other joint supplements that can be used to help manage arthritis in animals.
  • Consider acupuncture for your cat. This procedure is painless and has shown some success in animals.
  • Consider surgery for advanced cases of feline arthritis. Your veterinarian can tell you more.
  • Provide your cat with a low-stress environment, plenty of affection, and aids such as:
    • Slip-free flooring
    • Soft bedding
    • Ramps (instead of steps)
    • Help with grooming (regular brushing)
  • Caution: Many human and canine pain relievers are poisonous to cats.

How to give your cat eye medication

  • Many eye conditions in cats require medicine to be put directly into the eye.  
  • Follow your veterinarian’s recommendations closely.
  • Always put health and safety first. If the procedure seems dangerous to you or very painful for your pet, stop and consult your veterinarian.
iStock-867676192.jpg

The Basics

Many eye conditions in cats require medicine to be put directly into the eye. This procedure can be relatively easy, as long as you follow a few simple guidelines. The most important guideline is to always put health and safety first. If, for any reason, your cat becomes so agitated that you feel you are at risk of being bitten, stop. If the procedure seems excessively painful for your cat, stop and get your veterinarian’s advice.

Follow Recommendations

The eye is a very delicate structure. It is very important to closely follow your veterinarian’s recommendations for medicating your cat’s eye. Treating too frequently or too aggressively can make the problem worse, not better. Sensitive, already inflamed parts of the eye can be damaged.

It is important to use only medicines prescribed by a veterinarian and to treat for the full length of time prescribed. Do not stop treatment early, even if the problem seems to be resolved.

What You Need

  • Safe work area
  • Eye medication prescribed by your veterinarian
  • Moist cotton balls or tissues

Technique

There are several techniques for applying eye medication. Only one is described here. Ask your veterinarian to demonstrate application of the prescribed medicine and follow his or her recommendations.

  • If necessary, gently restrain your cat (see Restraining Your Cat, below). You may need a helper.
  • Using moistened cotton balls or tissues, gently wipe away any discharge from around the eye.
  • Hold the affected eye open with the fingers of one hand.  If the medication is liquid (eye drops), hold the upper and lower eyelids apart; if the medication is an ointment, gently pull down on the lower eyelid to create a small gap between the lid and the eye. You may see a white membrane (the third eyelid) partly covering the eye.
  • With your other hand, gently squeeze the prescribed amount of medicine into the eye. Drops can be applied to the center of the eye or in the gap between the eye and the lower lid; ointment can be placed in the gap. Do not touch your cat’s eye with the medicine container or your fingers.
  • Note: If an eye medication requires refrigeration, do not store it at room temperature; however, allow it to reach room temperature before use to make it more comfortable for your pet.
  • Either allow your pet to blink to move the medicine across the eye, or, using a very light touch, hold the eye closed for a moment and gently massage.
  • Use cotton balls or tissues to gently wipe away any excess medication or discharge.
  • Reward your cat with a treat.

Contact your veterinarian if you have questions or difficulty administering any medication.

Signs of Eye Trouble

  • Excessive tearing
  • Discharge
  • Red eyelids
  • Third eyelid visible
  • Squinting or closing eye
  • Cloudy or dull-looking surface; visible mark on surface
  • Pawing at face
  • Swelling or bulging around, near, or in eye

Restraining Your Cat

Keeping your cat still while you medicate his or her eye is important so that you do not accidentally damage the eye or touch the eye with the medicine container. Here are some tips:

  • Place your cat in your lap and allow him or her to lie down flat on his or her side. Put one arm—the one you will use to hold the eye open—on top of your pet’s body, and use your upper arm and elbow to help keep him or her still. Do not use excessive force to hold your cat still.
  • If your cat will not stay in your lap, you can use the same method while seated on the floor. Your cat may be more comfortable sitting upright. 
  • Alternatively, cats can be wrapped in a large towel and held against your body, leaving only the head free. Be sure not to wrap your cat too tightly.
  • If your cat struggles, talk to him or her calmly. Stop if he or she becomes extremely agitated. 

How to give your cat ear medication

  • Many outer ear infections in cats require medicine to be put directly into the ear.  
  • Follow your veterinarian’s recommendations closely.
  • Always put health and safety first. If the procedure seems dangerous to you or very painful for your pet, stop and consult your veterinarian.
iStock-811620660.jpg


The Basics

Many outer ear infections in cats require medicine to be put directly into the ear. This procedure can be relatively easy, as long as you follow a few simple guidelines. The most important guideline is to always put health and safety first. If, for any reason, your pet becomes so agitated that you feel you are at risk of being bitten or scratched, stop. If the procedure seems excessively painful for your pet, stop and get your veterinarian’s advice.

Some cats may also need ear cleanings at home. Your veterinarian can tell you whether and how often to clean your cat’s ears.

Severe infections or ones that involve the middle or inner ear may require oral medication in addition to an ear medication.

Follow Recommendations

The ear is a very delicate structure. It is very important to closely follow your veterinarian’s recommendations for medicating your cat’s ear. Treating too frequently or too aggressively can make the problem worse, not better. Sensitive, already inflamed parts of the ear can be damaged. It is important to use only medicines prescribed by a veterinarian.

What You Need

  • Old clothes
  • Safe, easy-to-clean work area (e.g., tile or linoleum floor, water-resistant walls)
  • Towel
  • Ear medication prescribed by your veterinarian
  • Cotton balls or tissues

Technique

There are several techniques for applying ear medication. The simplest one is described here. Please follow your veterinarian’s instructions.

  • Choose a space that’s easy to clean (e.g., bathroom, laundry room, shower stall). Applying the medicine can be messy.
  • Wear old clothes and keep a towel handy.
  • If necessary, gently restrain your cat (see Restraining Your Cat, below). You may need a helper.
  • Hold the medication bottle or tube just over the opening of the affected ear and gently squeeze the prescribed amount of medicine into the ear. For liquid medicines, do not squeeze the bottle too hard, as a powerful stream can irritate tender, inflamed ear structures. Note: If an ear medication requires refrigeration, do not store it at room temperature; however, allow it to reach room temperature before use to make it more comfortable for your pet.
  • Fold the earflap down against your cat’s head and try to prevent your cat from shaking his or her head too much. Gently massage the very base of the ear to distribute the solution as far as possible into the ear canal. Ask your veterinarian to demonstrate this massage.
  • Keep the medicine in the ear for the prescribed amount of time.
  • Allow your cat to shake his or her head to remove some of the medicine. (This is the messy part.)
  • Use cotton balls or tissues to gently wipe away any discharge, loosened debris, and remaining medicine from the earflap, side of the neck, hair below the ear, and opening of the ear canal. Do not use cotton swabs because a sudden shake of the head or slip of the hand could result in a cotton swab puncturing the delicate eardrum or pushing debris inside the inner ear canal.

Please contact your veterinarian if you are experiencing difficulties in administering any medication.

Signs of Ear Trouble

  • Odor
  • Scratching/rubbing at ears or side of head
  • Discharge
  • Debris
  • Shaking/tilting of the head
  • Pain
  • Head shyness (not wanting the head or ears to be touched)
  • Irritability

Restraining Your Cat

Although some cats are willing to sit or lie quietly while you clean their ears, most object. Here are some tips on how to keep your cat from wiggling while you work:

  • Place your cat on a stable work surface that you can stand next to, and allow him or her to lie down, either in an upright “sphinx” position or flat on his or her side. While standing next to your cat, put the arm you will use to treat the ear over your cat’s shoulders, and use your upper arm and elbow to press your cat against your torso to help keep him or her still. You can use your other hand to hold your cat’s head still and keep the earflap back. If necessary, move to your cat’s other side or turn your cat around to treat the other ear.
  • If you don’t have a high work surface, you can use the same method while seated on the floor, either holding the front of your cat’s body partially against your body or with your cat in your lap.
  • Alternatively, cats can be wrapped in a large towel and held against your body, leaving only the head free. Be sure not to wrap your cat too tightly.
  • If your cat struggles, talk to him or her calmly. Stop if he or she becomes extremely agitated. Massaging the base of the ears (unless they are painful) should feel good to your cat and may help calm him or her enough that you can resume treatment.
  • Be sure to reward good behavior.

How to get your (big-boned) cat to exercise

  • Regular exercise is important to your cat’s health because it burns calories, reduces appetite, maintains muscle tone, and increases metabolism (the rate at which calories are burned).
  • You can help your cat become more active and stay fit by scheduling regular playtimes.
  • Consult your veterinarian before beginning an exercise program for your cat.

Cats are notorious for preferring sleep to exercise. However, regular exercise is important to your cat’s health because it burns calories, reduces appetite, maintains muscle tone, and increases metabolism (the rate at which calories are burned). Here are some ideas to get your cat moving:

iStock-489730388.jpg


  • Leave out tissue paper and empty cardboard boxes and paper bags to inspire play
  • Provide fresh catnip
  • Encourage your cat to chase toys, sticks with attached feathers, balls, or flashlight pointers (never point these at an animal’s or person’s eyes)
  • Provide a cat tree to inspire climbing
  • Provide scratching posts or pads
  • Encourage play with other pets (set up play dates with the pets of friends or relatives; consider adopting another pet)
  • Train your cat to do tricks for low-calorie or small treats (e.g., train your cat to run to you from across the house or climb a cat “tree” when you shake the treat container; reward your cat with just one treat)
  • Provide specially designed activity toys that require your cat to do some work to remove a treat

You can help your cat become more active and stay fit by scheduling regular playtimes. Consult your veterinarian before beginning an exercise program for your cat.

Note:  Choose cat toys carefully. Cats may try to eat string or small parts of toys, which can be dangerous to their health. Do not leave toys out for cats to play with unattended.

How to administering subcutaneous fluid to a cat

  • The procedure of injecting a sterile fluid solution directly under the skin is referred to as subcutaneous fluid administration.
  • The advantages of the subcutaneous fluid route include a lower cost (compared with the intravenous route) and ease of administration.
  • Your veterinary health team will work with you to make sure you know how to give subcutaneous fluid injections without injuring yourself or your cat.
iStock-119807829.jpg

What Are Subcutaneous Fluids?

Fluid administration is a regular part of veterinary medical care. Any time that a patient is dehydrated or needs fluids, your veterinarian determines the best way to provide them. Fluids can be given by mouth, injection into a vein (known as intravenous fluids or IV fluids), or injection directly under the skin – a procedure known as subcutaneous fluid administration.

If a pet is able to eat and drink, giving fluids by mouth may be an option. However, if the pet is vomiting, unwilling to drink, or unable to obtain enough fluids through drinking, other methods of fluid administration must be considered. To receive intravenous fluids, pets generally need to be hospitalized because only a small amount can be given at a time and the IV catheter (through which the fluids are given) requires special care and maintenance. However, subcutaneous fluids can be given in larger amounts over a relatively short period of time, so hospitalization is frequently not required. The injection of sterile fluid is given under the skin and absorbed slowly over the next several hours. Advantages of the subcutaneous route include a lower cost (no catheter is required, and hospitalization is often not necessary) and ease of administration.

When Are Subcutaneous Fluids Necessary?

Cats being treated for chronic kidney disease are the most likely to receive subcutaneous fluids on a regular basis. Your veterinarian may also recommend subcutaneous fluids for pets that are vomiting or unable (or unwilling) to drink adequate amounts of water. Examples may include cats receiving chemotherapy, cats with liver disease, or cats with a high fever.

Depending on the medical condition being treated, your veterinarian may recommend fluid injections daily, every other day, or a few times a week. The frequency of injections and the amount of fluids given at each injection may change over time, so be sure to keep a notebook detailing when fluids are given and how much.

Getting Started

Before you get started, your veterinary health team will work with you to make sure you know how to give the subcutaneous fluid injections without injuring yourself or your cat. If you aren’t comfortable or need additional training sessions, don’t be afraid to ask!

Here are a few things to consider:

  • Be sure you can handle your cat without being injured. This may not be an issue if your cat is very compliant and is used to being handled. However, if you have had problems in the past trying to trim nails, give a pill, or perform other procedures on your cat, you may need help giving fluid injections. Talk to your veterinary care team about tips for properly restraining your cat for fluid injections before attempting your first session. In some cases, you may need another person to help hold your cat so that you can safely give the injection.
  • Don’t be afraid to ask questions. Your team of veterinary professionals will be glad to answer any questions you may have about safely administering fluid injections to your cat.
  • Record your cat’s fluid schedule on the calendar. Include the date and time that the fluids need to be administered. This will help you to avoid forgetting to give fluids to your cat and to remember when the course of treatment is completed.
  • It’s okay to leave fluid injections to the professionals. Giving fluid injections to a cat requires skill, patience, and confidence. If you aren’t comfortable trying to give injections at home, ask your veterinary team if the injections can be done at your veterinarian’s office.

The new fluid bag, fluid line, and needles are sterile until they are opened. It is important to handle these items properly to avoid contaminating them. Your veterinary care team will show you how to assemble the fluid line and bag and to attach a fresh needle without breaking sterility. Be sure to change the needle after each injection; the fluid line can be changed when each bag of fluids is completed.

For the fluids to flow from the bag and into your pet, the fluid bag must be suspended over the area where your pet is sitting. Many pet owners use a bent wire coat hanger to hang the fluid bag over the top of a door; you can then sit in a nearby chair and hold the cat while fluids are being given.

Proper Restraint

Your cat may be happy lying or sitting on your lap while you administer the fluid injection. However, you should place a towel or blanket across your lap (to avoid getting scratched) in case your cat tries to jump down. Some cats do better on a smooth surface, such as a table; the top surface of a washing machine can simulate the smooth metal table at your veterinarian’s office, which might encourage your cat to remain still during the procedure. Additionally, some cats do better with two people administering the injection – one person to hold the cat, and the other one to give the injection.

Giving the Fluid Injection

Your veterinary care team will show you how to administer fluids before you have to try it alone at home:

  • Find an area of loose skin; the skin over the middle of the back or just behind the shoulder blades generally works well.
  • Gently pinch a section of loose skin between your thumb and forefinger. When you pull the loose skin gently upward, you should see a small indentation of skin between your fingers.
  • Insert the sterile needle directly into the indentation. Keep the needle level (or parallel) to the surface of the skin on the back. If your angle of injection is too sharp, you may enter a muscle, go through the skin, or stick your own finger.
  • Once the needle has been inserted, open the dial on the fluid line to begin administering fluids. The procedure should take only a few minutes.
  • When the desired amount of fluid has been given, remove the needle (backing out along the same path that was used to enter the skin) and gently pinch the skin for a few seconds to help prevent the fluid from flowing back out.
  • If there is no bleeding or leakage of fluid, release your cat after giving him or her praise and a big hug for being a good patient!

Ask your veterinary team to teach you how to administer fluid injections safely. If you aren’t comfortable giving injections, ask about scheduling outpatient visits for the fluid injections to be given.

Explaining pet loss to a child

Our companion animals are often treasured members of the family, and we mourn for them when they die or are euthanized. It is important to recognize your feelings of loss and grief and to express them in your own way. In addition, when your child is attached to a pet that dies or is euthanized, it is important to recognize his or her feelings of loss and help your child express those feelings.

cat pet child death loss.jpg

The Human–Animal Bond

The human–animal bond is increasingly recognized as a powerful and unique relationship. This bond offers much-needed comfort and companionship in our hectic lives, even improving our mood and blood pressure! When our beloved animals die or are euthanized, it is important to recognize our feelings of bereavement and to express them. Families often have a pet for a number of years, so children grow up with the pet as part of the family. Unfortunately, dogs and cats usually live for only 10 to 15 years and smaller animals usually live for fewer years, so a child may lose a few pets before reaching adulthood. Recognizing the importance of the pet in your child’s life and preparing your child for the loss are crucial to helping your child cope with grief.

What to Do

Children are often very attached to the family pet, so loss of a pet can be very traumatic for a child. Honesty is the best policy when explaining a pet’s death to your child, but you should use languageappropriate for your child’s age. Your child wants to understand what happened, so use simple terms; however, do not say that the pet “was put to sleep” because your child may become afraid to sleep. Your child needs time to grieve and may want to memorialize the pet by making a scrapbook or having a memorial service. Talk with your veterinarian about obtaining your pet’s ashes and burying them (if your municipality permits this). Ask about other memorials that your veterinarian may offer, such as making a paw print for a keepsake that your child may treasure. To help your child focus on happy memories, share funny stories about your pet and frame a picture of your child with your pet.

Seek Assistance

Talk with your veterinarian about ways to help your child cope. It may be helpful for your veterinarian to talk with your child. It is important for parents to inform school officials that their child has lost a pet. If your child shows behavioral changes or signs of depression, your child may need to talk with a professional counselor.

Many veterinary schools offer a pet-loss support hotline and support groups for small animal owners experiencing the loss of a pet. Several good sources of information on pet loss are available, including Argus Institute (for families and veterinary medicine) at the College of Veterinary Medicine & Biomedical Sciences at Colorado State University (www.argusinstitute.colostate.edu).

What to Do If Your Child’s Pet Dies or Is Euthanized

  • Honesty is the best policy when explaining a pet’s death to your child, but use language appropriate for your child’s age.
  • Memorialize the pet by making a scrapbook or having a memorial service.
  • Talk with your veterinarian about obtaining your pet’s ashes and burying them.
  • Ask your veterinarian about memorials that he or she may offer, such as making a paw print as a keepsake for your child.
  • To help your child focus on happy memories, share funny stories about your pet and frame a picture of your child with your pet.

Bad kitty breath? Your kitty might need a (tiny) toothbrush

  • Periodontal disease can lead to tooth loss and affects most cats before they are 3 years old. Bacteria from periodontal disease can spread to affect other organs and cause illness.
  • Before you start brushing your cat’s teeth, have them checked by your veterinarian.
  • Make toothbrushing enjoyable for your cat by rewarding him or her immediately after each session.
  • Be very patient when teaching your cat to accept toothbrushing.
  • If your cat won’t tolerate toothbrushing, your veterinarian can recommend plaque-preventive products for your cat.
cat teeth toothbrush.jpg

Periodontal Disease—Why Brush?

Periodontal (gum) disease can lead to tooth loss and affects most cats before they are 3 years old. Bacteria from periodontal disease can spread to affect other organs and cause illness. One of the best ways to help prevent periodontal disease is to brush your cat’s teeth on a regular basis—daily, if he or she will allow it.

Cats are never too young to start having their teeth brushed at home; in fact, the younger they are, the better.

Before you start brushing your cat’s teeth, have them checked by your veterinarian. Your veterinarian may recommend a dental cleaning to remove any existing plaque and tartar, which contribute to periodontal disease. If your cat has severe dental disease, extraction of the affected teeth may be recommended. Follow your veterinarian’s recommendation on how long to wait after dental cleaning or extraction before brushing your cat’s teeth.

What You Need

  • Baby toothbrush or pet toothbrush that is an appropriate size for your cat; if your cat won’t tolerate a toothbrush, a small piece of washcloth can be used
  • Pet toothpaste
  • Treat or other reward your cat really likes

Note: Do not use toothpaste for people or baking soda because these can upset your cat’s stomach. Cat toothpaste comes in different flavors (e.g., poultry, beef). You may need to try a couple flavors to find the one your cat likes the best. The more your cat likes the toothpaste, the easier it will be to train him or her to accept brushing.

Technique

  • Toothbrushing should be a bonding experience that is constantly reinforced with praise and rewards. Be very patient—teaching your cat to accept toothbrushing may take weeks. Make toothbrushing enjoyable for your cat by rewarding him or her immediately after each session.
  • You only need to brush the outside of your cat’s teeth—the side facing the cheek. Only do as much at a time as your cat allows. You may not be able to do the whole mouth at first.
  • If you are ever worried about being bitten, stop. Ask your veterinarian about how best to care for your cat’s teeth.
  • Start by letting your cat get used to the toothbrush and toothpaste. Put them out and let your cat sniff them. You can let your cat taste the toothpaste to see if he or she likes it.
  • Also, get your cat used to you touching his or her mouth. Lift his or her lips, and slowly and gently rub your cat’s teeth and gums with your finger. You might want to dip your finger in something your cat finds tasty, like juice from a can of tuna.
  • When your cat is comfortable with you touching his or her mouth and is familiar with the toothbrush and toothpaste, gradually switch to putting the toothpaste on your finger, and then to putting the toothpaste on the toothbrush. Let your cat lick the paste off the brush at first to get used to having the brush in his or her mouth. If your cat won’t tolerate a toothbrush, a small piece of washcloth can be used. Place a small amount of toothpaste on the washcloth, and rub it over the outside surfaces of your cat’s teeth.
  • Brush your cat’s teeth along the gum line. Work quickly—you don’t need to scrub. Work up to 30 seconds of brushing for each side of the mouth at least every other day.
  • If you notice any problems as you brush, like red or bleeding gums or bad breath, call your veterinarian. The earlier problems are found, the easier they are to treat.

Other Ways to Control Plaque

Although there’s no substitute for regular toothbrushing, some cats just won’t allow it. If you can’t brush your cat’s teeth, ask your veterinarian about plaque-preventive products. Feeding dry food may also help keep your cat’s teeth and gums in good condition. The Seal of Acceptance from the Veterinary Oral Health Council appears on products that meet defined standards for plaque and tartar control in dogs and cats.

Signs of Dental Problems

  • Bad breath
  • Sensitivity around the mouth
  • Loss of appetite and/or weight
  • Yellow or brown deposits on the teeth
  • Bleeding, inflamed, and withdrawn gums
  • Loose or missing teeth
  • Pawing at the mouth or face
  • Difficulty chewing

Your cat needs exercise too. Here's how to do it

  • Regular exercise is important to your cat’s health because it burns calories, reduces appetite, maintains muscle tone, and increases metabolism (the rate at which calories are burned).
  • You can help your cat become more active and stay fit by scheduling regular playtimes.
  • Consult your veterinarian before beginning an exercise program for your cat.
cat play exercise energy.jpg

Cats are notorious for preferring sleep to exercise. However, regular exercise is important to your cat’s health because it burns calories, reduces appetite, maintains muscle tone, and increases metabolism (the rate at which calories are burned). Here are some ideas to get your cat moving:

  • Leave out tissue paper and empty cardboard boxes and paper bags to inspire play
  • Provide fresh catnip
  • Encourage your cat to chase toys, sticks with attached feathers, balls, or flashlight pointers (never point these at an animal’s or person’s eyes)
  • Provide a cat tree to inspire climbing
  • Provide scratching posts or pads
  • Encourage play with other pets (set up play dates with the pets of friends or relatives; consider adopting another pet)
  • Train your cat to do tricks for low-calorie or small treats (e.g., train your cat to run to you from across the house or climb a cat “tree” when you shake the treat container; reward your cat with just one treat)
  • Provide specially designed activity toys that require your cat to do some work to remove a treat

You can help your cat become more active and stay fit by scheduling regular playtimes. Consult your veterinarian before beginning an exercise program for your cat.

Note:  Choose cat toys carefully. Cats may try to eat string or small parts of toys, which can be dangerous to their health. Do not leave toys out for cats to play with unattended.

How to trim your cat's nails—and keep you both happy and relaxed

  • Nail trimming should be a calm, stress-free experience for you and your cat.
  • If your cat experiences pain from nail trimming, you will probably have trouble trimming his or her nails in the future, so make sure that you clip just the tip of each nail.
  • Contact your veterinarian if you are unsure of how to cut your cat’s nails or if you experience difficulties.
trim cat nails clippers claws

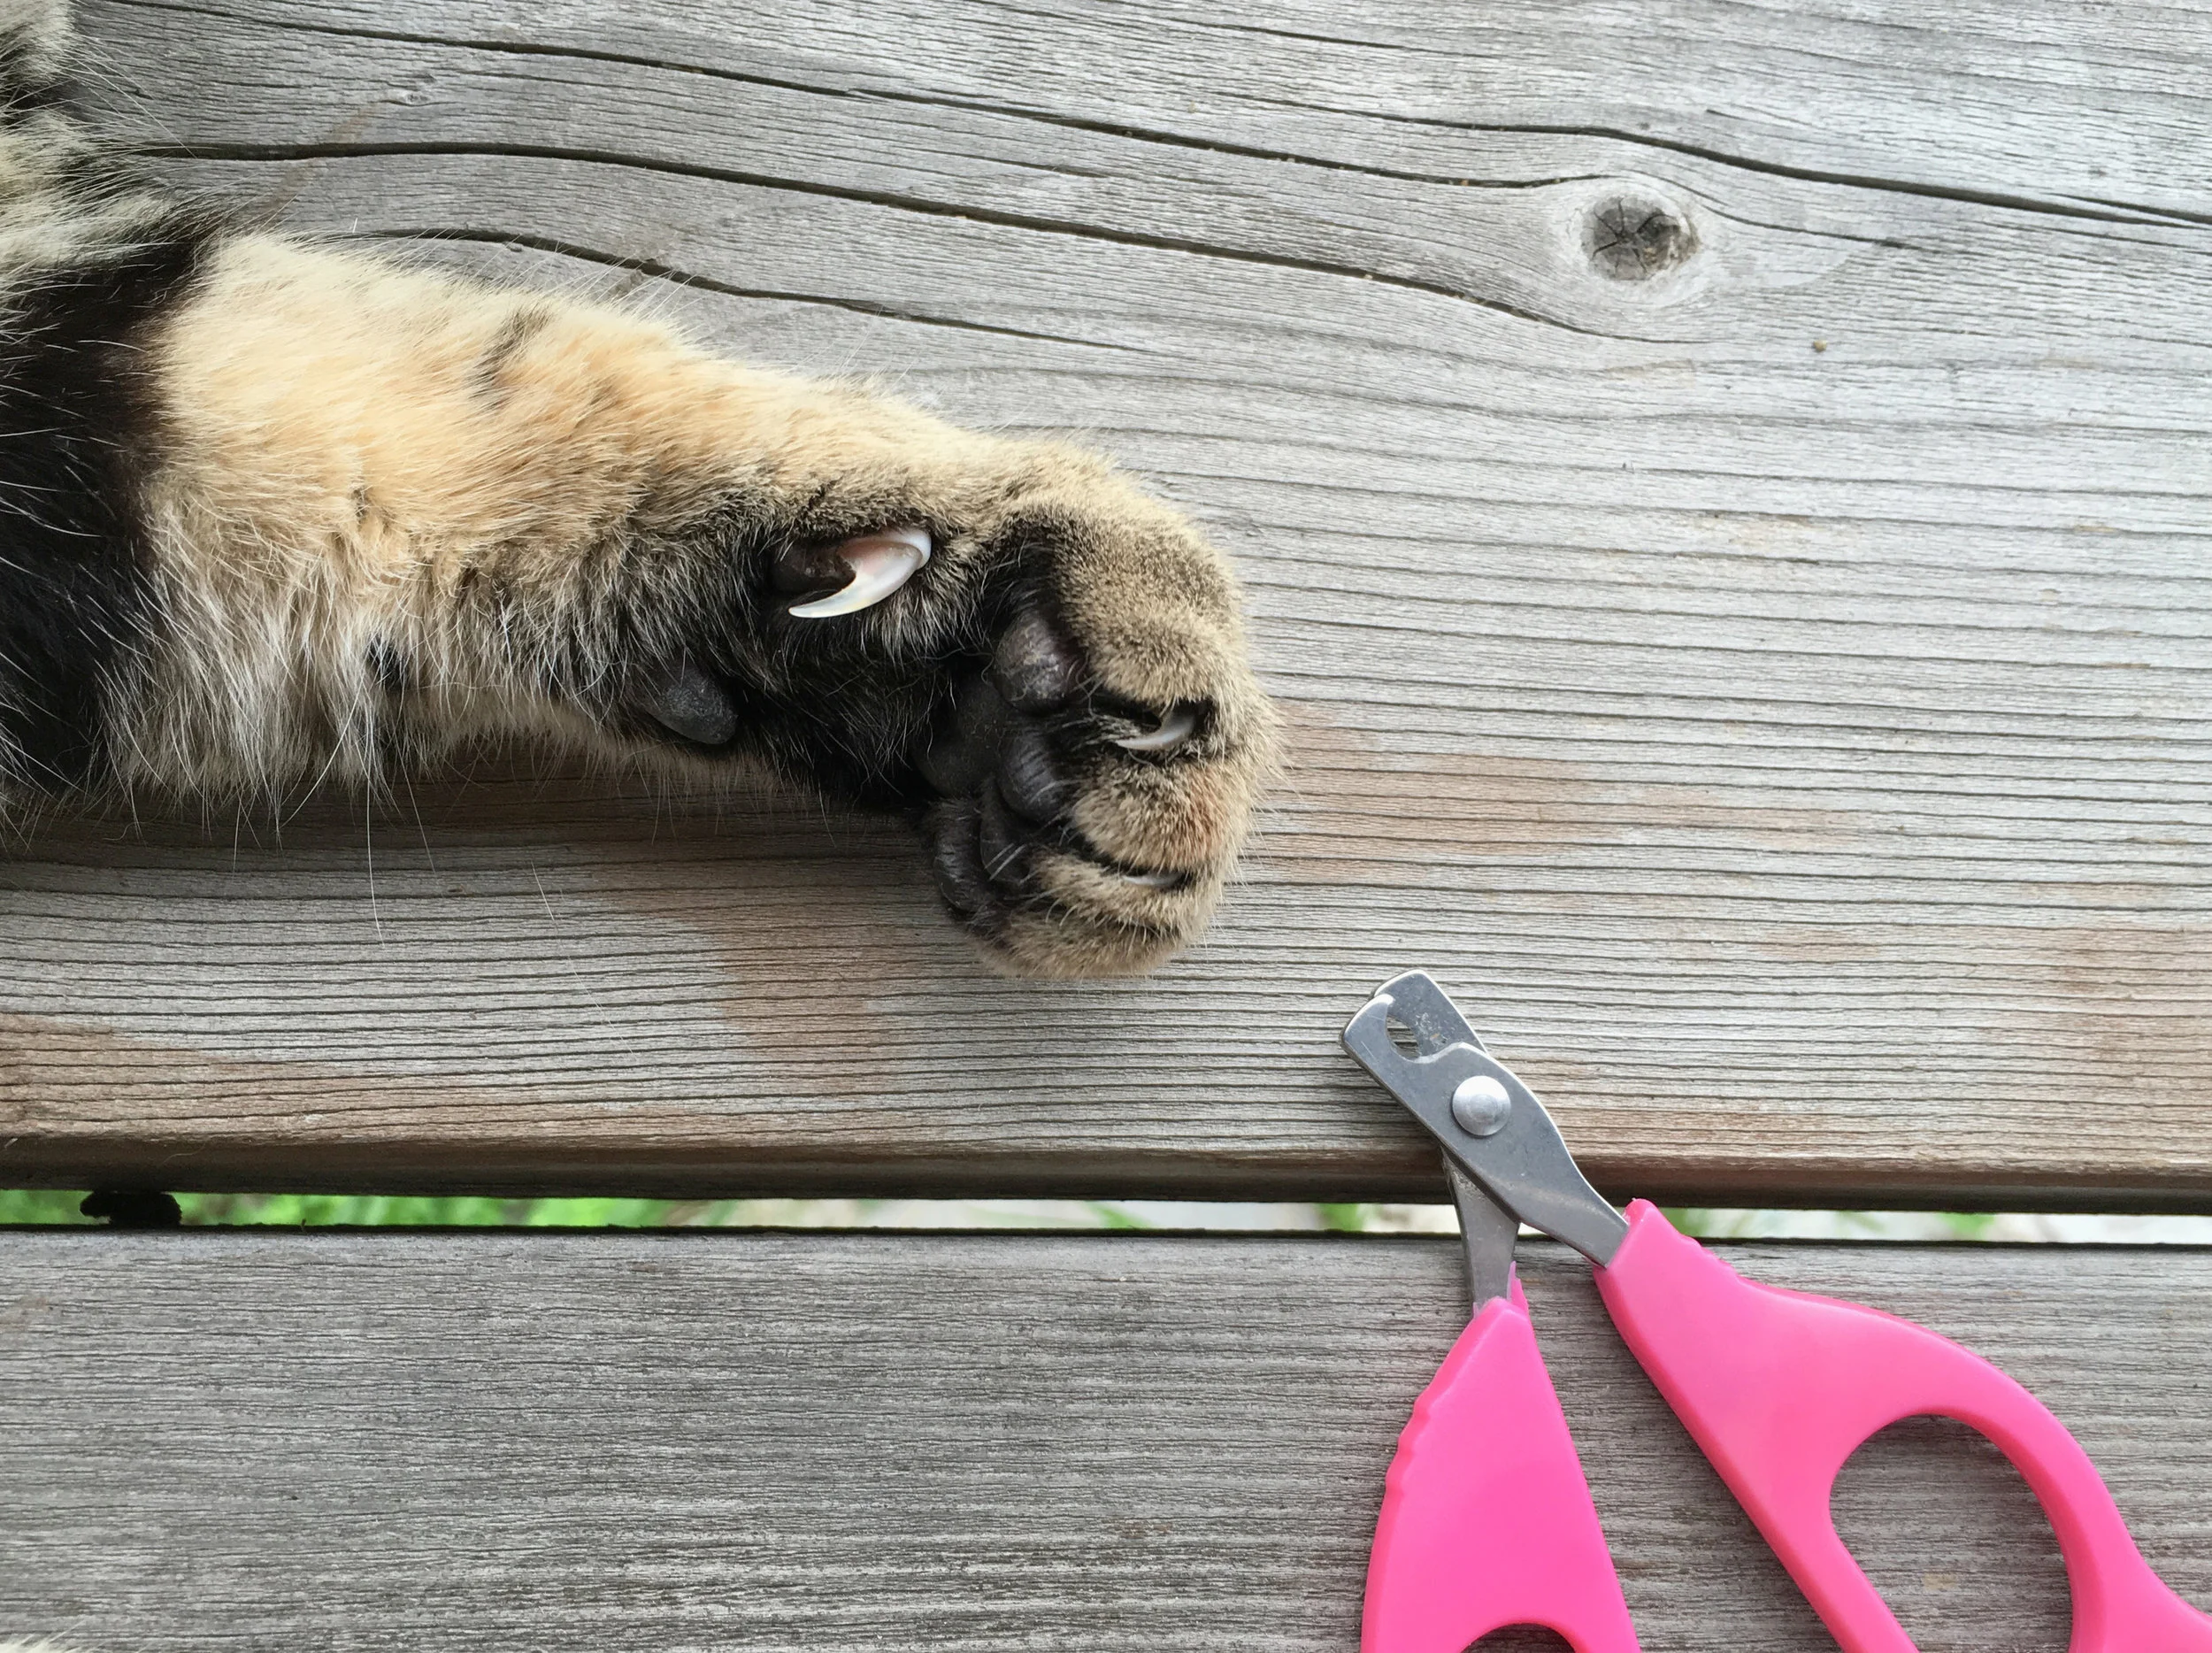
Nail trimming should be calm and stress-free for you and your cat. Teaching your cat to accept having his or her feet touched can help make nail trimming easier. Ideally, cats should be introduced to nail trimming when they are kittens. Most cats require nail trimming every 10 days to 2 weeks. Contact your veterinarian if you are unsure of how to cut your cat’s nails or if you experience difficulties. 

The Setup

Collect your clippers and something to control bleeding in case it occurs (see below for suggestions and more on bleeding). You can use scissors-type, guillotine-type, or even human nail clippers. Find a chair in a quiet room where your cat can sit comfortably on your lap while facing away from you. You may want to place a folded towel or blanket on your lap in case your cat’s nails are very sharp and he or she tries to jump down before you’ve completed the nail trim. Choose a time when your cat is relaxed or even sleepy, such as after a meal or a period of activity. Ensure that other pets aren’t around and that your cat won’t be distracted by activity outside nearby windows.

The Technique

To trim your cat’s nails, put your thumb on top of a paw and your fingers underneath it for support. Gently press your thumb and fingers toward each other to extend the nails. Clip only the very tip of the nail (no more than 1/16 of an inch). Clip from top to bottom, not side to side. If your cat has light-colored nails, you might be able to see a pink area (called the quick) on the part of the nail closer to the paw. This is where the blood vessels and nerves are, and accidentally cutting it causes pain and bleeding. If your cat experiences discomfort or pain during nail trimming, you will probably have trouble trimming his or her nails in the future, so make sure that you keep the experience as pleasant as possible and clip just the tip of each nail.

If you accidentally cause the nail to bleed, apply styptic powder to the tip of the nail. If you don’t have styptic powder, gently dab the tip of the nail on a bar of soap or in a little flour or cornstarch.

If your cat struggles, talk to him or her calmly. If this doesn’t help, take a break and try trimming some nails later. Never punish your cat for not cooperating, but be sure to reward good behavior with praise or a treat.

How to give your cat a pill without making him hate you (it's possible—we promise)

  • Medicines in pill or capsule form are prescribed to treat a variety of conditions.
  • It is important to use only medicines prescribed by a veterinarian and to treat for the full length of time prescribed.
  • Do not stop treatment early, even if the problem seems to be resolved.
cat pill medication.jpg

The Basics

Medicines in pill or capsule form are prescribed to treat a variety of conditions, but many cats dislike taking pills. Some medicines that are usually prescribed as pills or capsules can be changed (compounded) to a liquid or a powder for easier administration. If you have trouble giving your cat pills, ask your veterinarian if compounding is possible for specific medicines.

Follow Recommendations

It is important to use only medicines prescribed by a veterinarian and to treat for the full length of time prescribed. Do not stop treatment early, even if the problem seems to be resolved. You can ask your veterinarian to demonstrate how to give the prescribed medicine.

Technique

Some cats will eat a pill or capsule if it is hidden in a treat or in their regular food. However, many cats will eat the treat or food and leave the pill. Also, if the pill is in food, it may be hard to tell whether your cat has taken the pill on time (or at all) if he or she eats throughout the day. Cat treats designed to hide pills are available in many stores. Ask your veterinarian if the prescribed medicine can be given with treats or food and if there are any restrictions on what your cat should eat while taking the medicine.

A more reliable method of giving a cat a pill is:

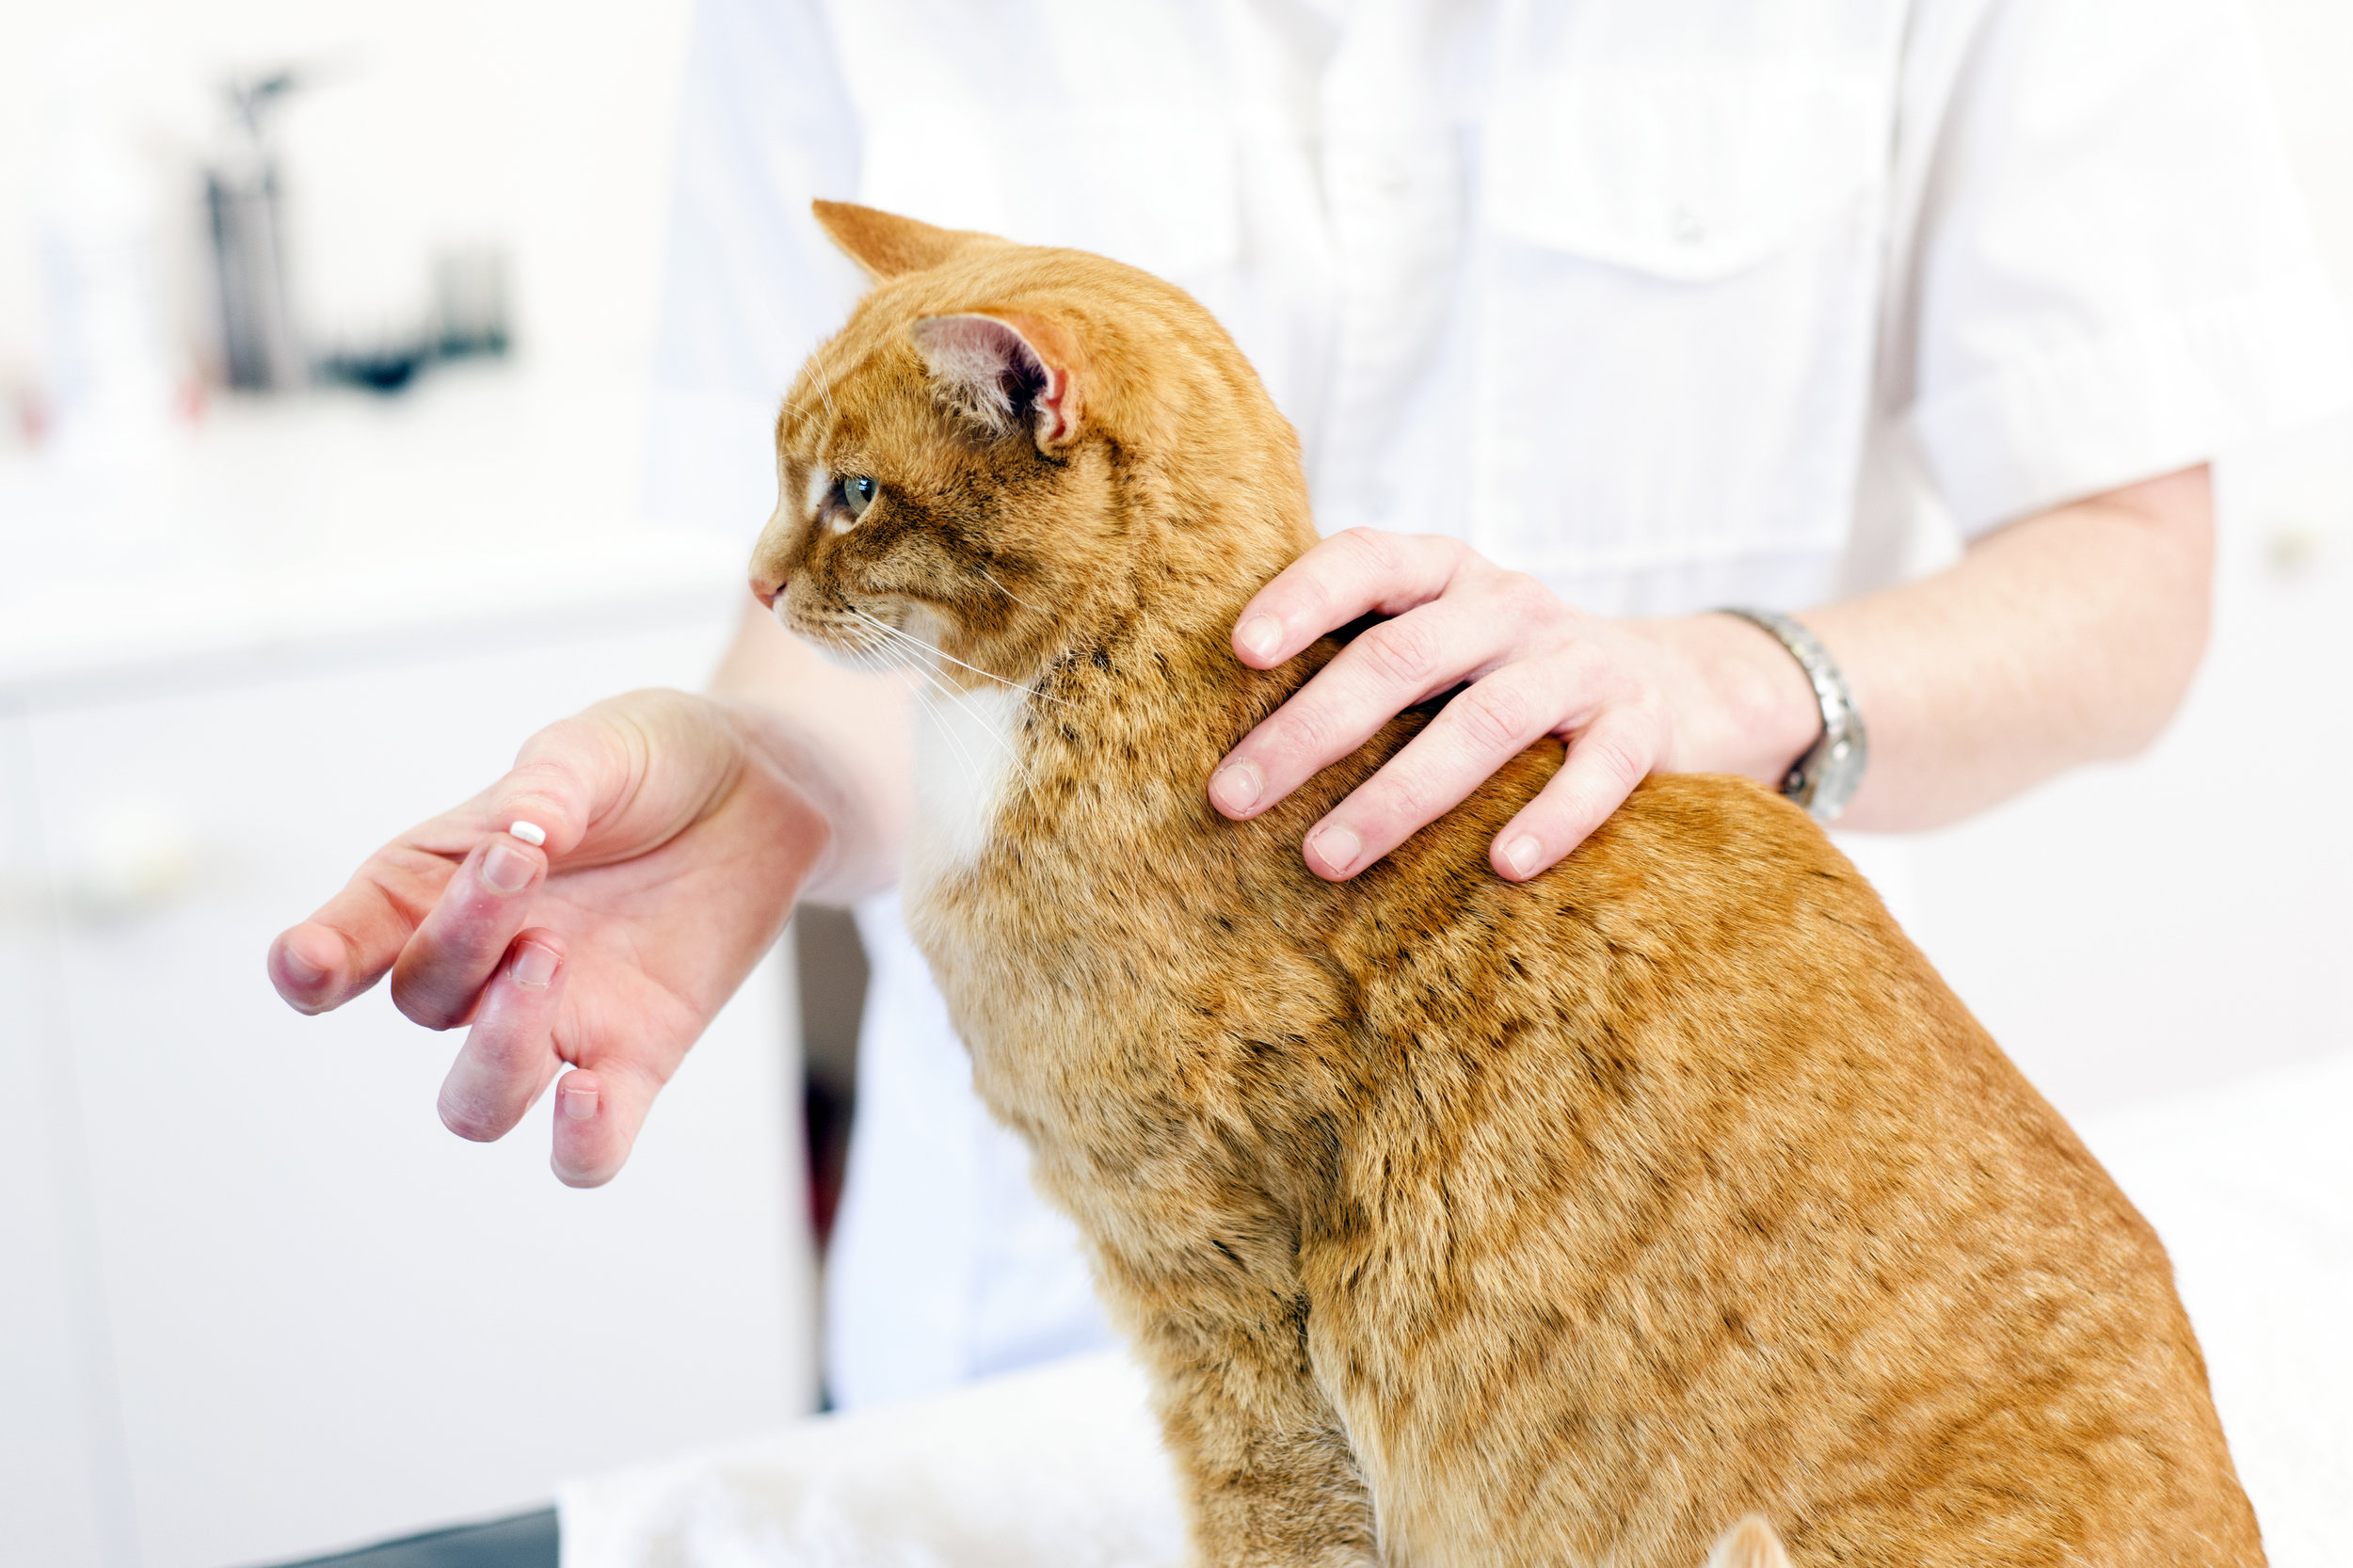
  • Put one hand on top of your cat’s head, holding firmly—but not too tightly—so that the tips of your thumb and middle finger touch the corners of the mouth.
  • Tilt the head back.  Your cat may open his or her mouth automatically at this point.
  • Hold the pill between the first finger and thumb of your other hand.  Use the tip of the middle finger of this hand to gently push down on your cat’s lower jaw. Be careful to place your finger on the short teeth at the very front of the mouth, not on the longer “canine” teeth at the corners.
  • Drop or quickly place the pill as far back in your cat’s throat as you can.  Do not push the pill down.
  • Hold your cat’s mouth closed and stroke his or her throat (or blow on his or her nose) to encourage swallowing.
  • Give your cat a reward (like a treat approved by your veterinarian) to make it a more pleasant experience.

When using this technique, be aware of your cat’s mood. If he or she gets agitated and seems likely to bite, stop and try again later or contact your veterinarian.

Contact your veterinarian if you have questions or difficulty administering any medication.

Restraining Your Cat

You may need help keeping your cat still while you administer medicine.  If you don’t have a helper handy, place your cat in your lap. Put one arm—the one you will use to hold the head—on top of your pet’s body, and use your upper arm and elbow to help keep him or her still. Do not use excessive force to hold your cat still.

If your cat will not stay in your lap, you can use the same method while seated on the floor. Your cat may be more comfortable sitting upright. 

If your cat struggles, talk to him or her calmly. Stop if he or she becomes extremely agitated. Contact your veterinarian if you have questions or difficulty administering any medication.

How to give your cat topical medication without freaking them out

  • Many conditions in cats require medicine to be applied to the skin.  
  • Follow your veterinarian’s recommendations closely.
  • Always put health and safety first. If the procedure seems dangerous to you or very painful for your pet, stop and consult your veterinarian.
topical medication cat flea cream

The Basics

Many conditions in cats require medicine to be applied to the skin. This procedure can be relatively easy, as long as you follow a few simple guidelines. The most important guideline is to always put health and safety first. If, for any reason, your pet becomes so agitated that you feel you are at risk of being bitten or scratched, stop. If the procedure seems excessively painful for your pet, stop and get your veterinarian’s advice.

Follow Recommendations

Topical medications come in several forms—creams, ointments, lotions, and patches. Applicators may or may not be provided. It is important to closely follow your veterinarian’s recommendations for applying these medications. Treating too frequently or too aggressively can make the problem worse, not better. Sensitive, already inflamed skin can be further damaged. It is important to use only medicines prescribed by a veterinarian and to treat for the full length of time prescribed. Do not stop treatment early, even if the problem seems to be resolved.

What You Need

  • Safe work area
  • Medication prescribed by your veterinarian
  • Latex or other gloves (if recommended)
  • Elizabethan collar (if necessary; ask your veterinarian for advice)

Technique

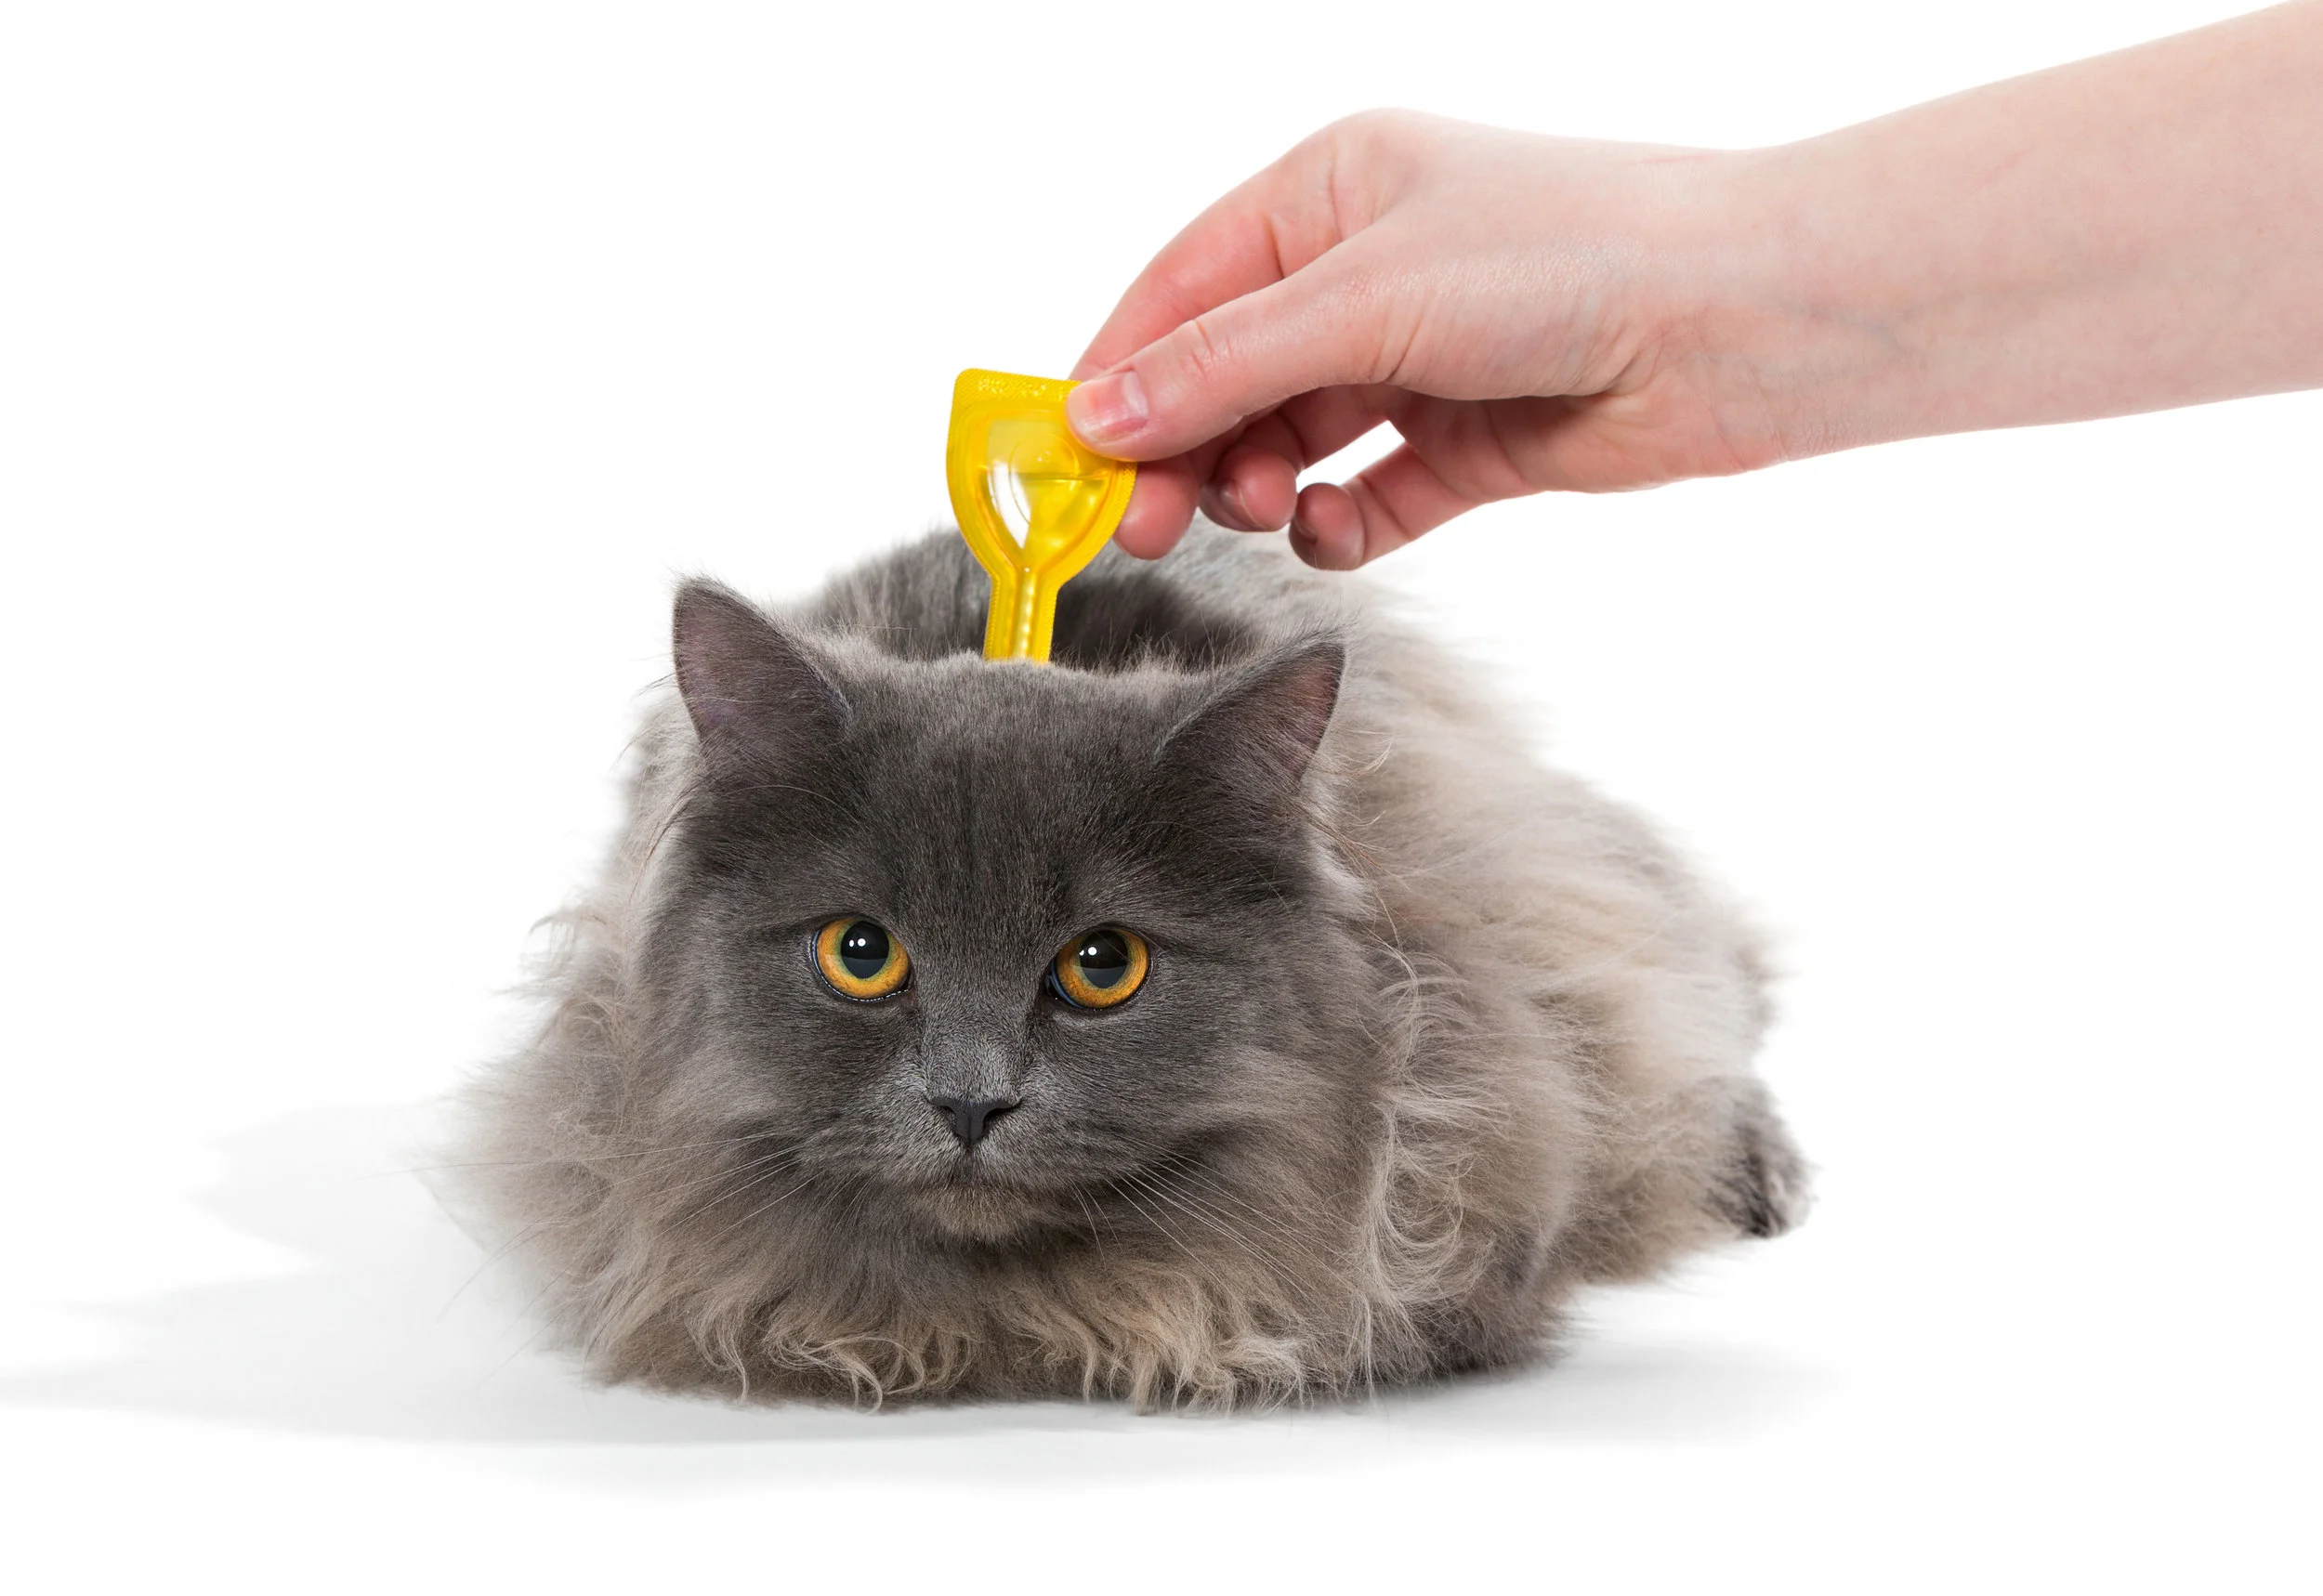
Your veterinarian will recommend the best technique for applying the medication, depending on whether it is a cream, ointment, lotion, or patch. If the medication comes with an applicator, follow the manufacturer’s instructions on how to use the applicator.

When applying topical medications, be aware of the following issues:

  • Some medications should be allowed to dry before people (especially children) or other pets come in contact with the treated cat. Follow instructions on how long to wait before allowing your cat to interact with family members.
  • If you are applying medication to inflamed or damaged skin, be careful not to further irritate the area with too much rubbing.
  • If you are using a patch (e.g., for pain control), be very careful that it does not come off and become stuck to a person or another pet.
  • If your cat consistently licks the medication off, ask your veterinarian about using an Elizabethan collar—a cone-shaped collar that fits over your cat’s head to prevent licking.

If your cat will not sit still while you apply the medication, you may find it easier to hold your cat on your lap. You may want to place a folded towel across your lap to reduce the chance of being scratched if your cat tries to get away. Alternatively, cats can be wrapped in a large towel and held against your body, exposing only the head and the area to be treated. Be sure not to wrap your cat too tightly.